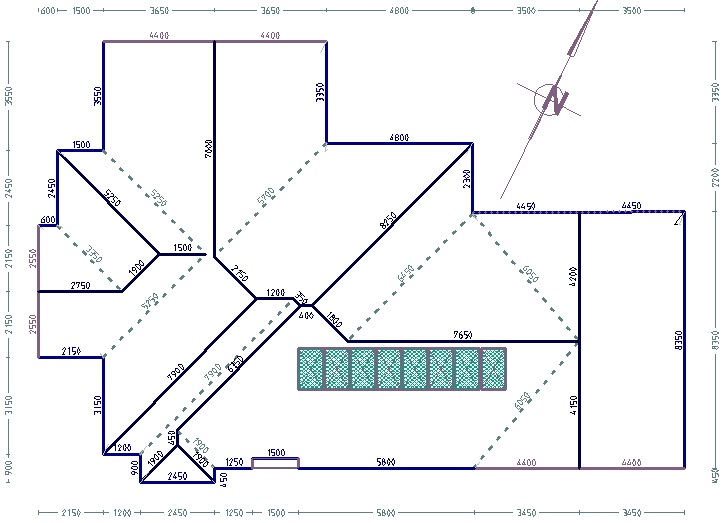
HelioScope supports uploading images to allow you to design solar arrays on roofs that haven't been built yet or captured by satellite imagery. The following guide describes how to scale and rotate a site plan based on the dimensions shown in the plan. If you have not already read our Overlay Upload Guide, please do that first.
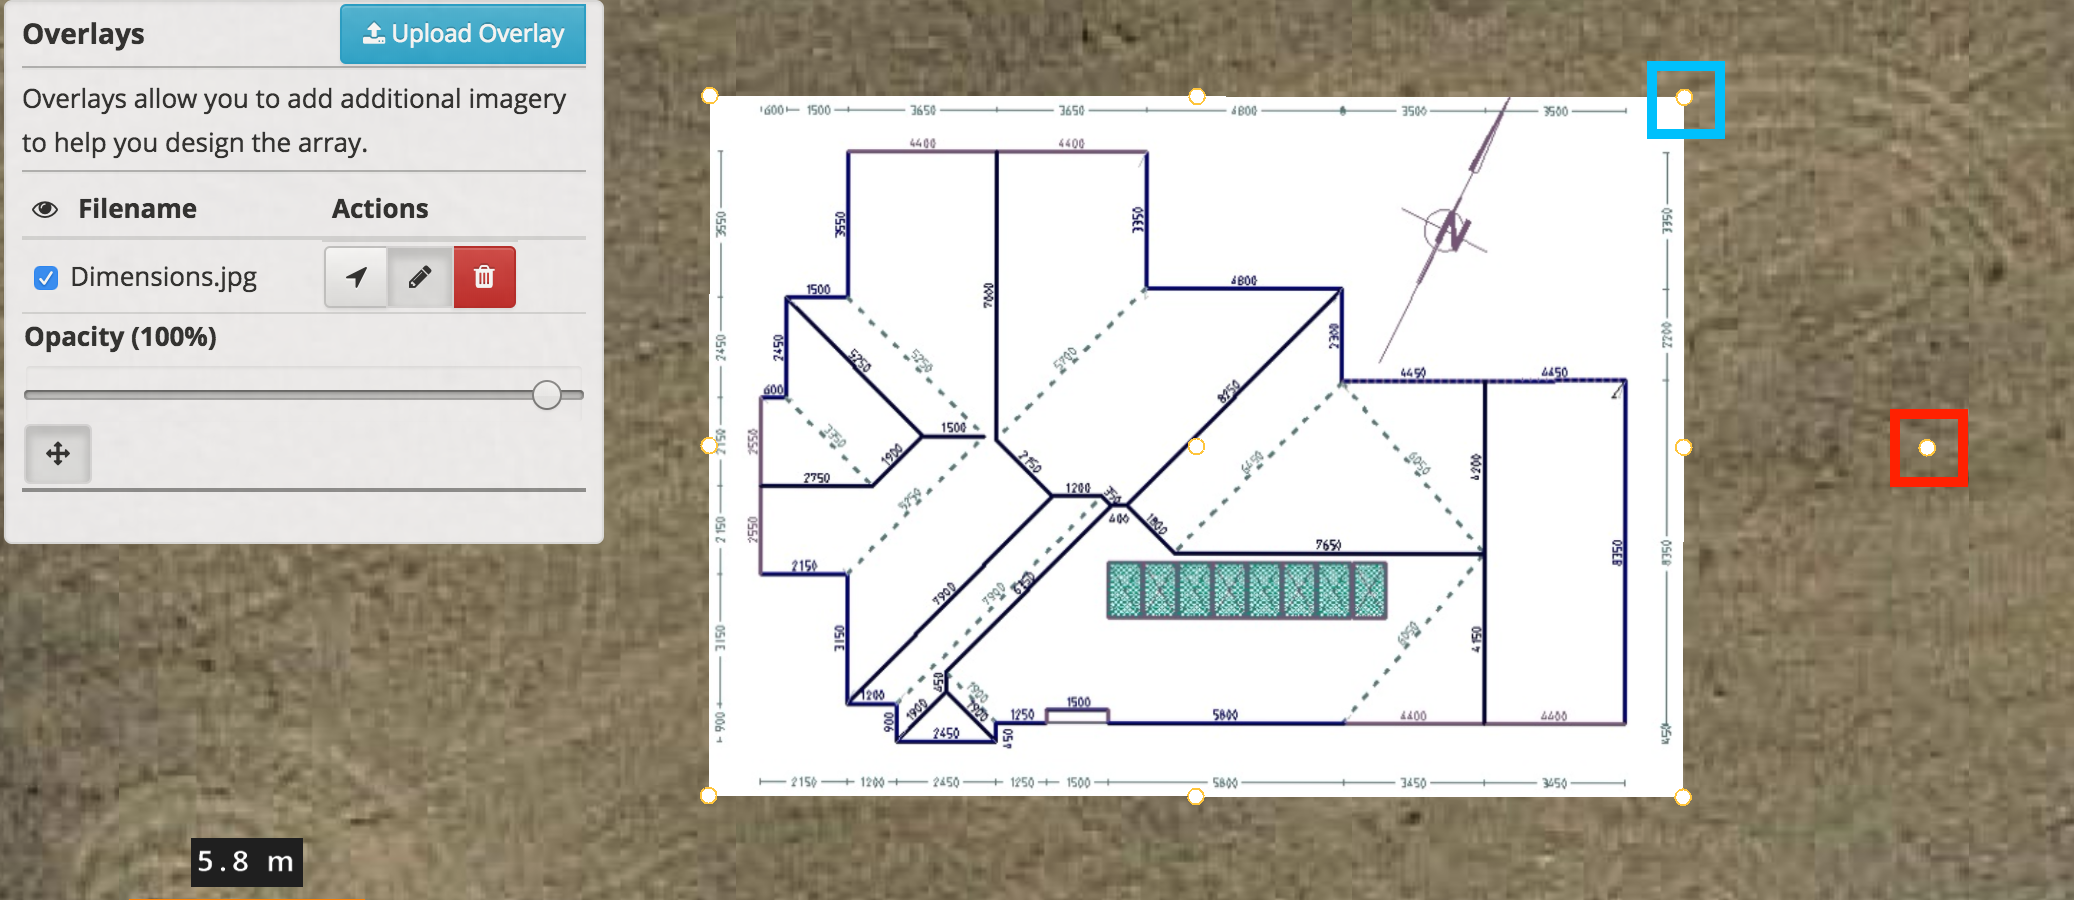
Once your image is uploaded you will need to scale the image and rotate to match the real world. First you will scale the image using the vertices on the corners of the image (highlighted in blue in the example below). Rotating the image will come later (the rotating vertex is highlighted in red).
Step 1
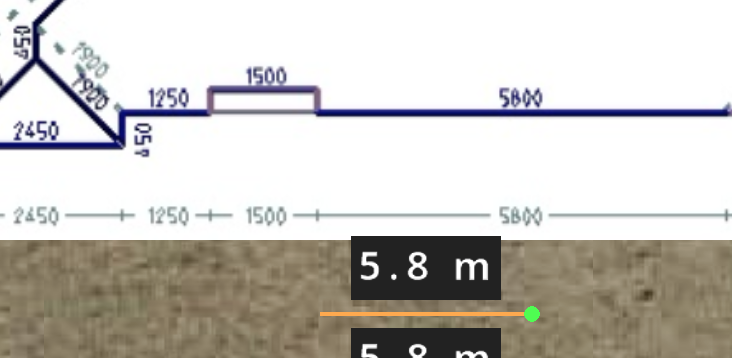
Draw a straight line keepout that is the same length as a known dimension in the site plan. In the example below, the gutter line is 5800 mm line so I have drawn a 5.8 m keepout to match.
Note: if you do not see the dimension labels around your keepout you can enable them in your preferences
Step 2
Adjust the size of the image overlay until the dimension in the drawing matches the keepout length.
 Step 3
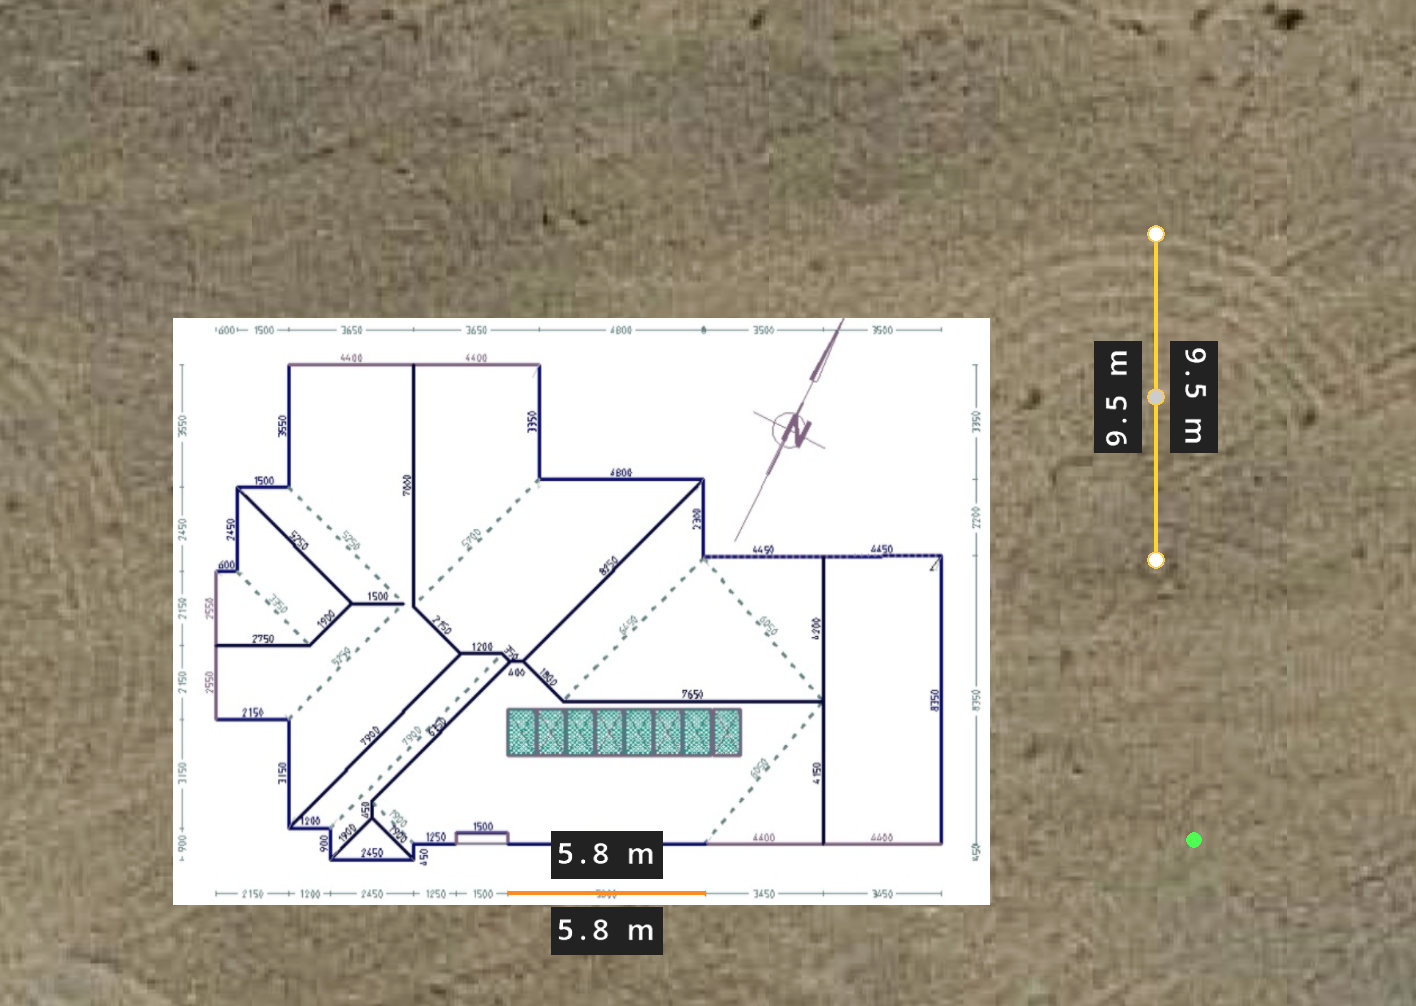
If your drawing is not perfectly oriented towards North, you will need to rotate it. When you start to draw a keepout and hold shift the keepout line will snap to be perfectly oriented with North and South.
Step 4
Rotate the image until the Keepout line and North indicator line of your drawing line up.
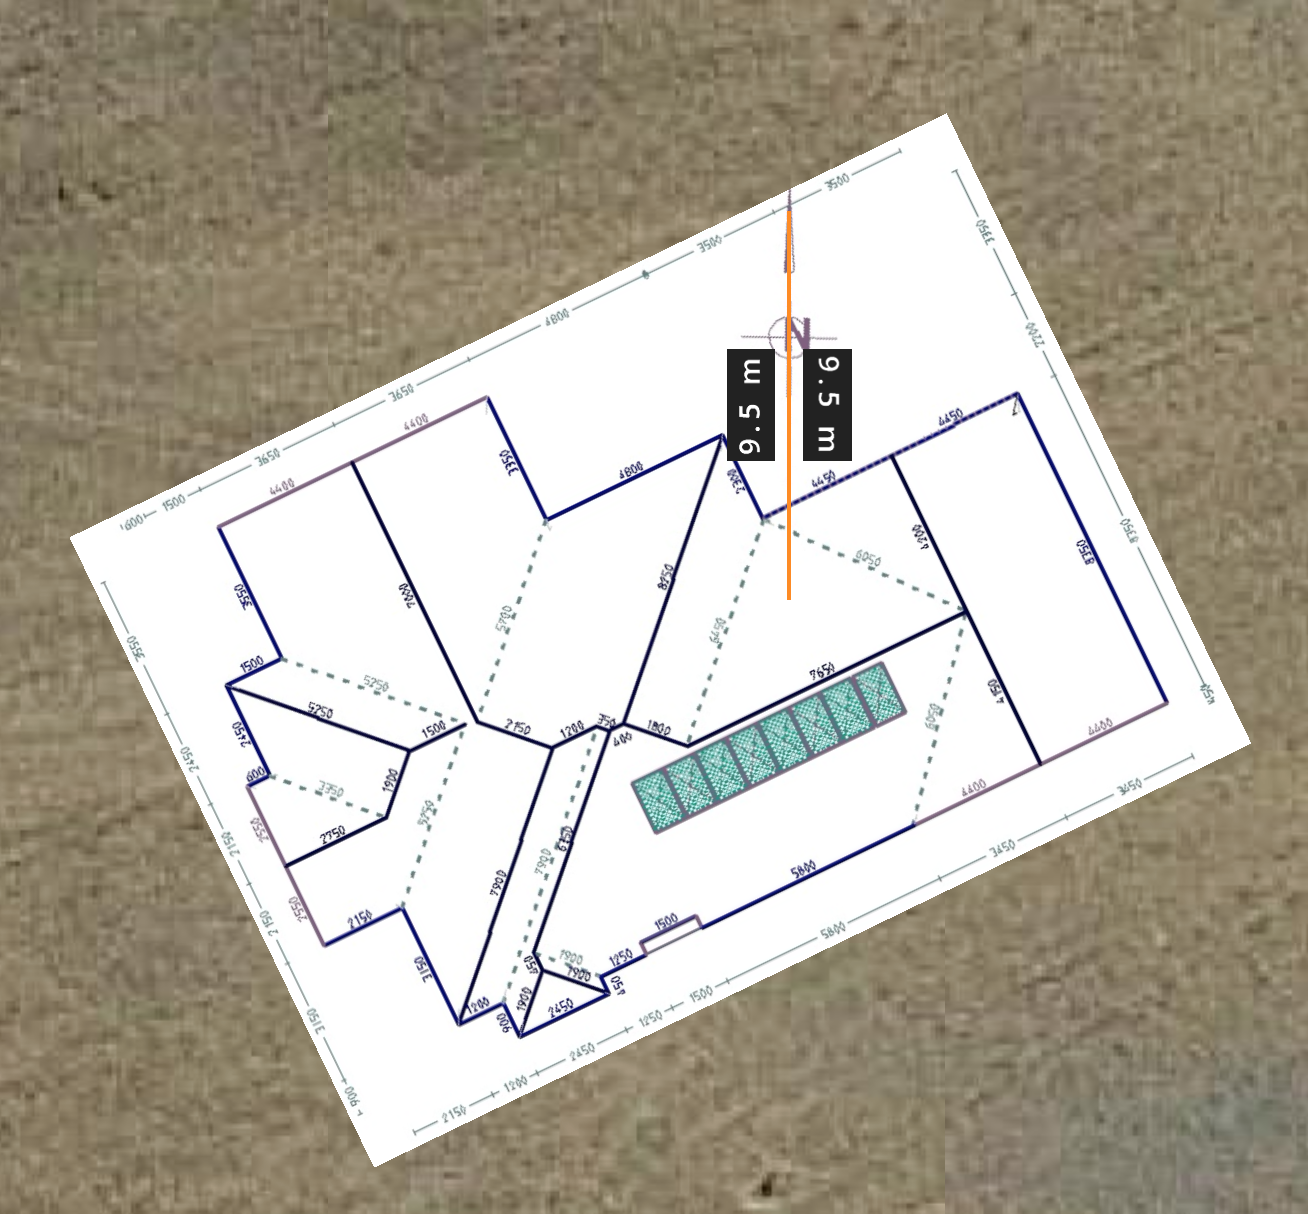 Your image is now scaled in HelioScope! You can double check the scaling by measuring other dimensions with keepouts.
Note: you can press the ESC-key after confirming the keepout matches if you don't want to place the keepout
