Introduction
HelioScope is commonly used for designing residential solar arrays. In order to have the best experience, follow these best practices when doing residential layouts.
Steps for designing residential arrays
- Create a Field Segment
- Select module
- Define Racking
- Set Azimuth
- Define Tilt
- Add setbacks
- Shift the array to the exact location
- Make edits to the current module configuration
- Set Row Spacing
- Select Alignment
- Add Keepouts
- Remove/restore shaded modules
- View in 3D
- Optimize shaded modules
- Choose Inverter
- Create a Field Segment: In the Mechanical Tab, click to Add New Field Segment. Click on points to outline the rooftop. Note: When drawing a field segment, hold down shift to have new lines snap to angles in 45º increments.
- Select the module: from the module drop-down menu. The Field Segment will automatically fill up with modules.
-
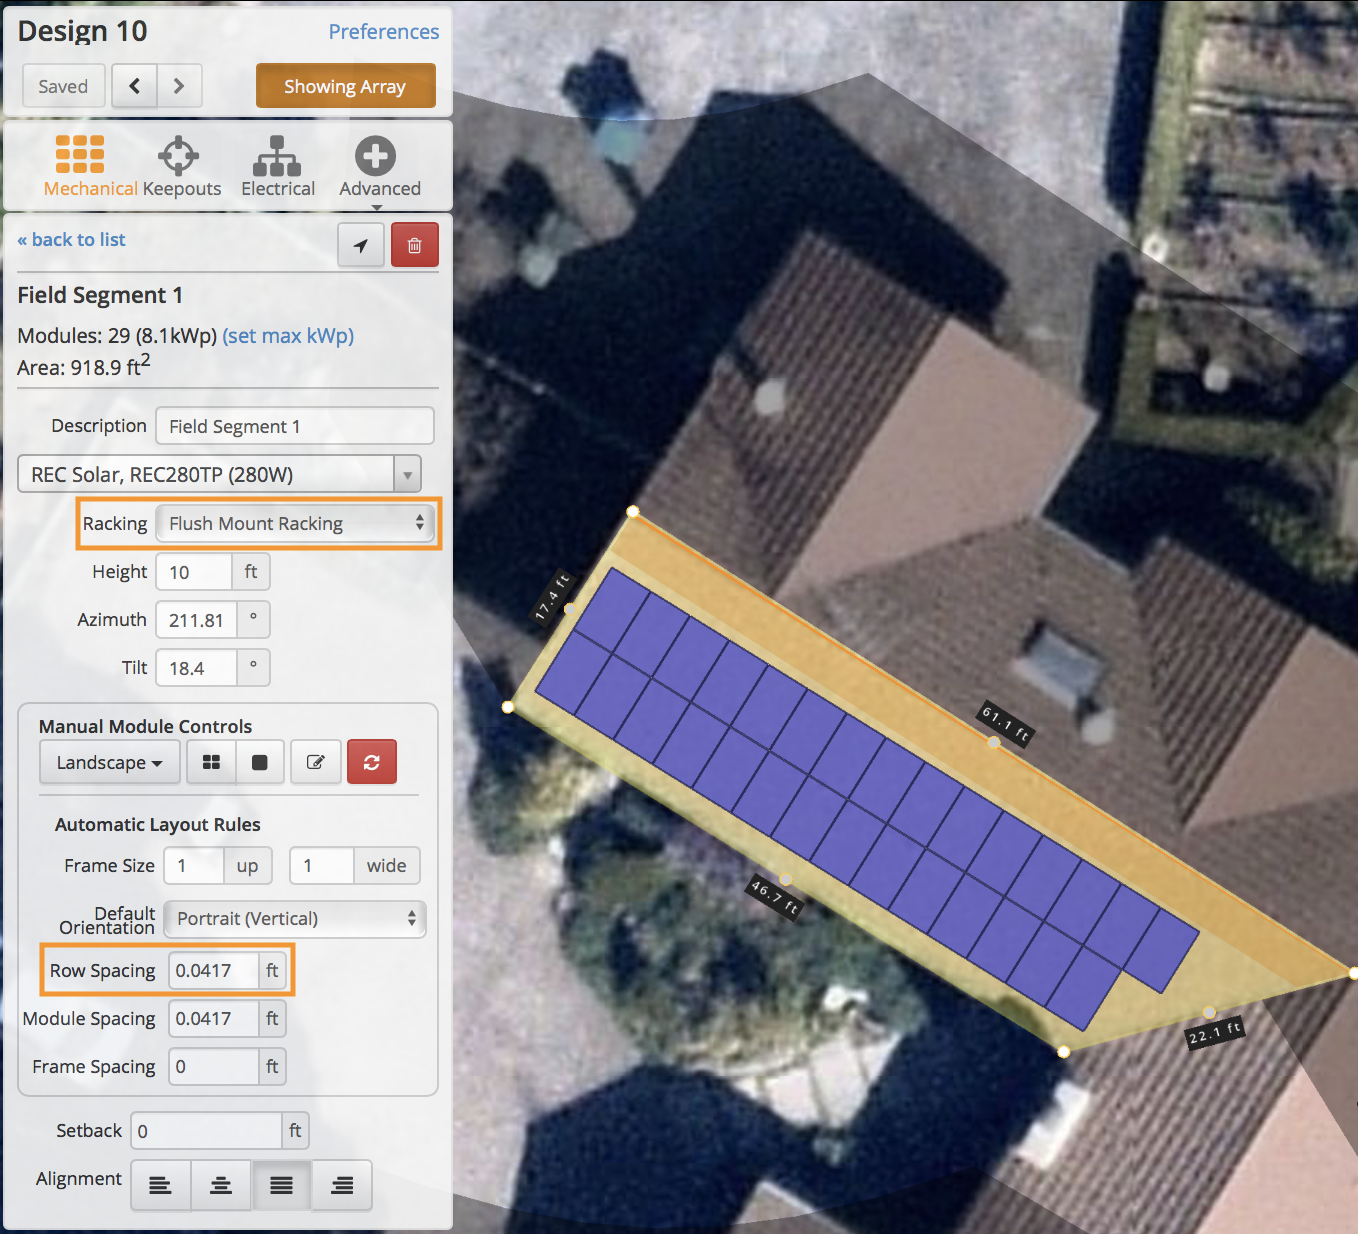
Racking: set to Flush Mount to design a tilted residential roof.
-
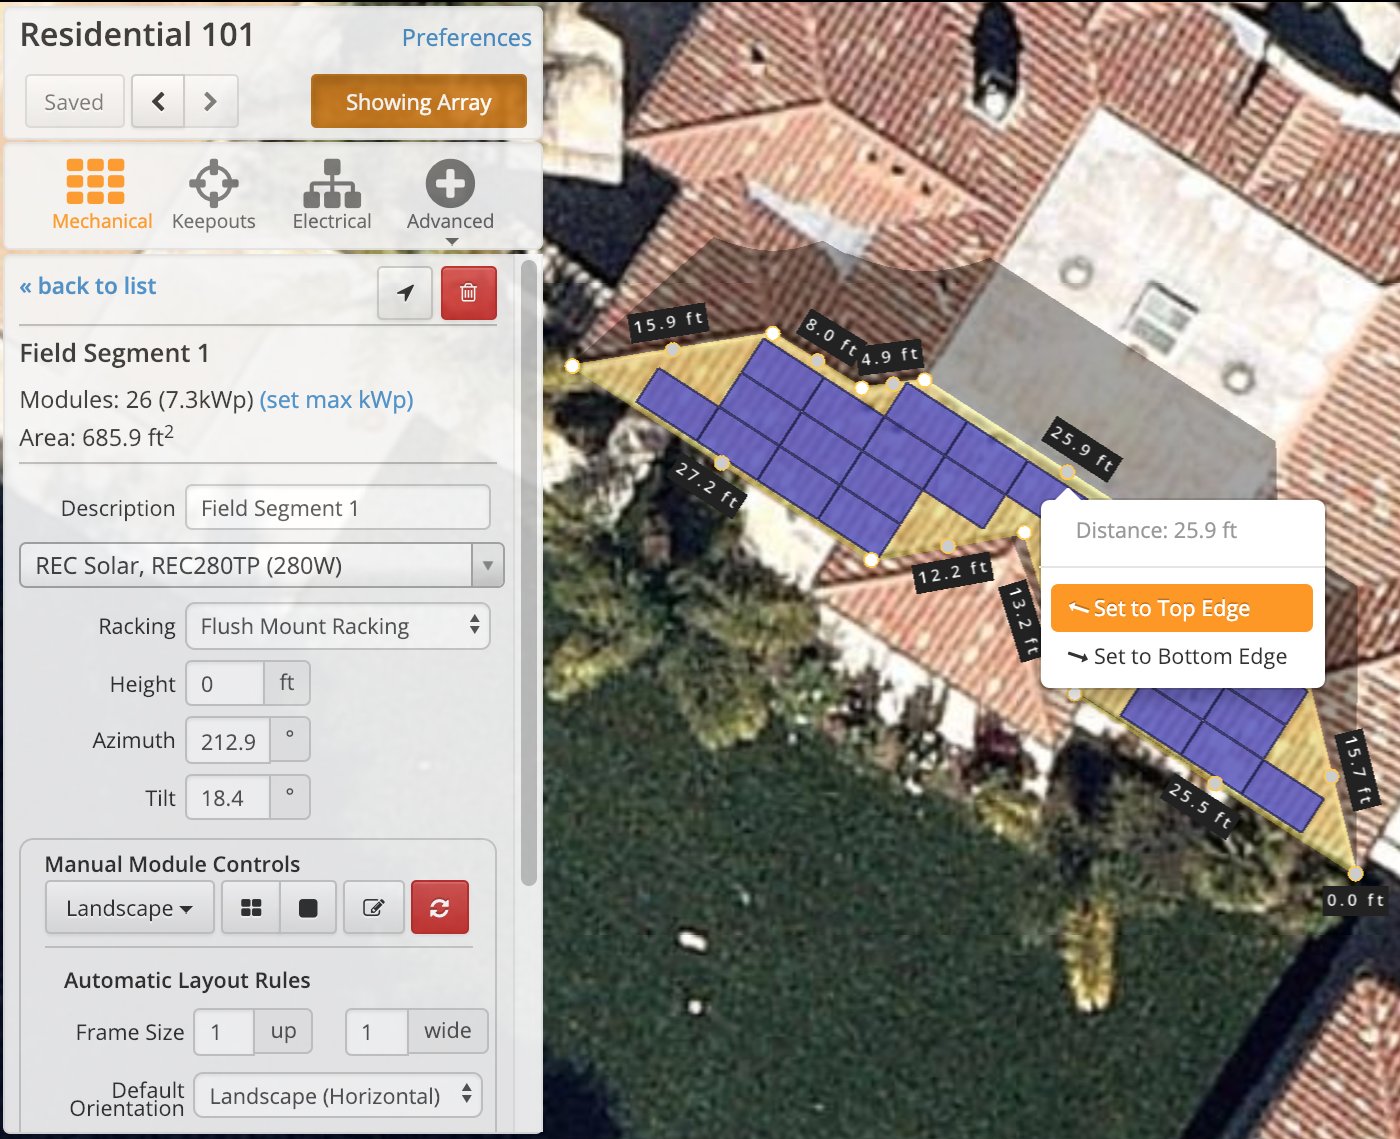
Azimuth: right-click the midpoint on the top or bottom edge of the roof to set it automatically to align with the edge of the roof.
- Tilt: Enter the tilt of the roof.
-
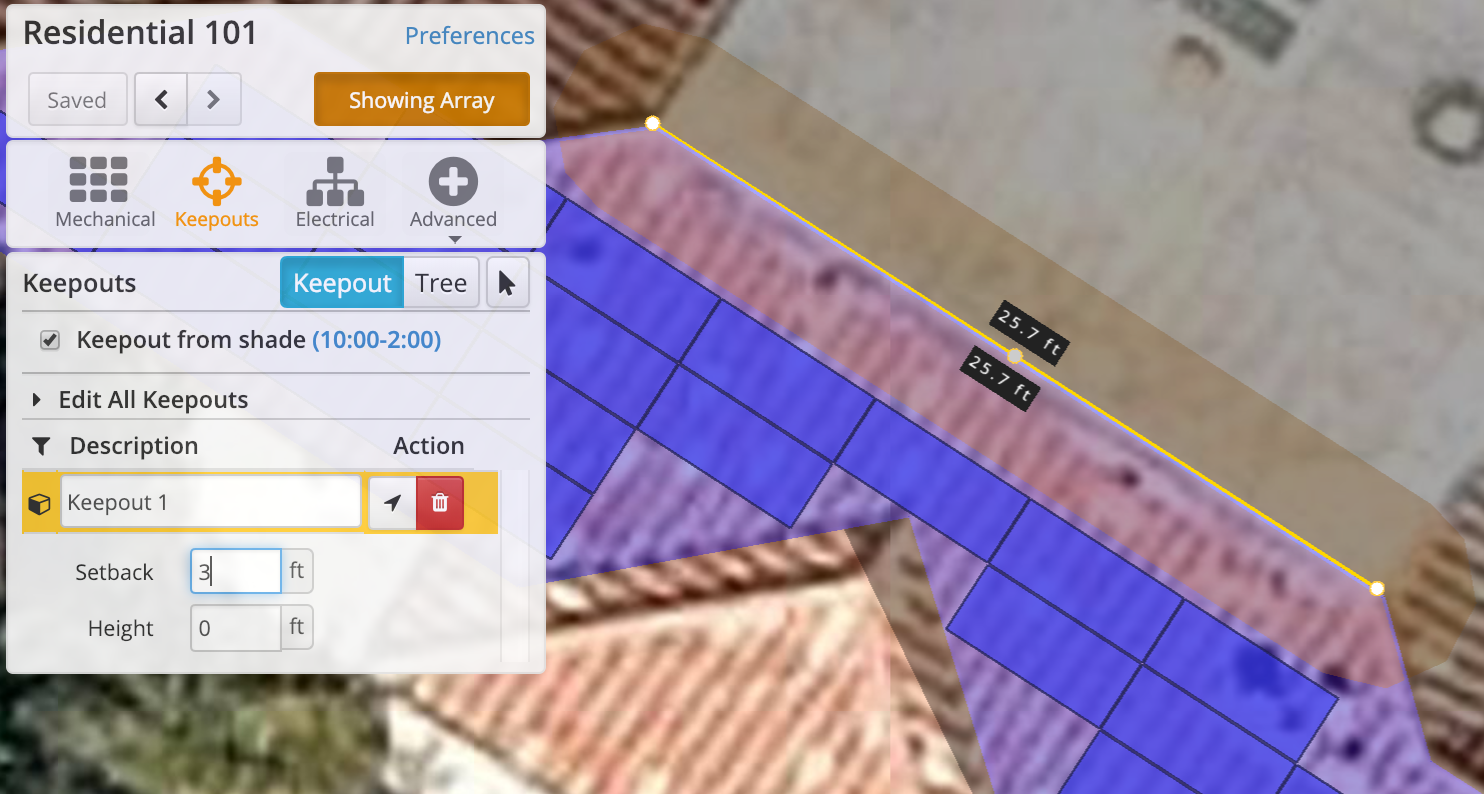
Setbacks: Use linear Keepouts for ridgeline setbacks.
-
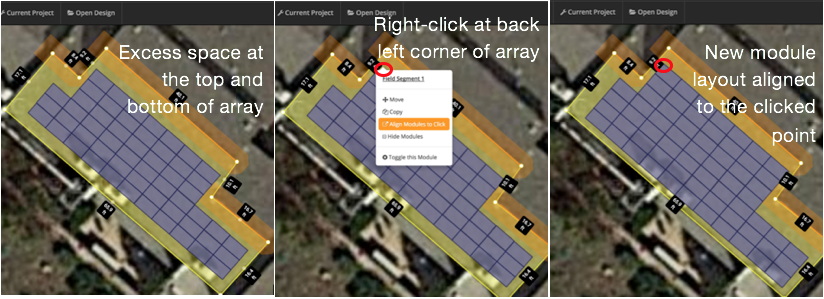
Shift array: Use Align to Click to fine-tune the module layout.
-
Delete modules: Right-click to delete individual modules. This can be done from the Mechanical or Keepout modes:
- In Mechanical, right-click the module, and select Remove this Module from the menu.
- In Keepouts, right-click the module and it will be eliminated immediately.
- Row Spacing: set to zero (or a small number, such as 0.04’ for mounting clips).
-
Module Alignment: choose the alignment for the modules from justified, centered, left, or right aligned.

- Add Keepouts: Access the Keepout tab. Select between object Keepouts and tree Keepout.
-
Remove/restore shaded modules: Keepouts with heights automatically remove modules on the winter solstice from 10AM to 2PM. You can restore modules in the shade by unchecking the Keepout from shade checkbox on the Keepouts tab.

-
Access Orbit or 3D view: Hold down Shift, click and drag the mouse to orbit the view in 3D. Dragging up and down tilts the perspective while dragging right and left rotates the view. This can help confirm that your roof planes are lined up and oriented in the right direction.
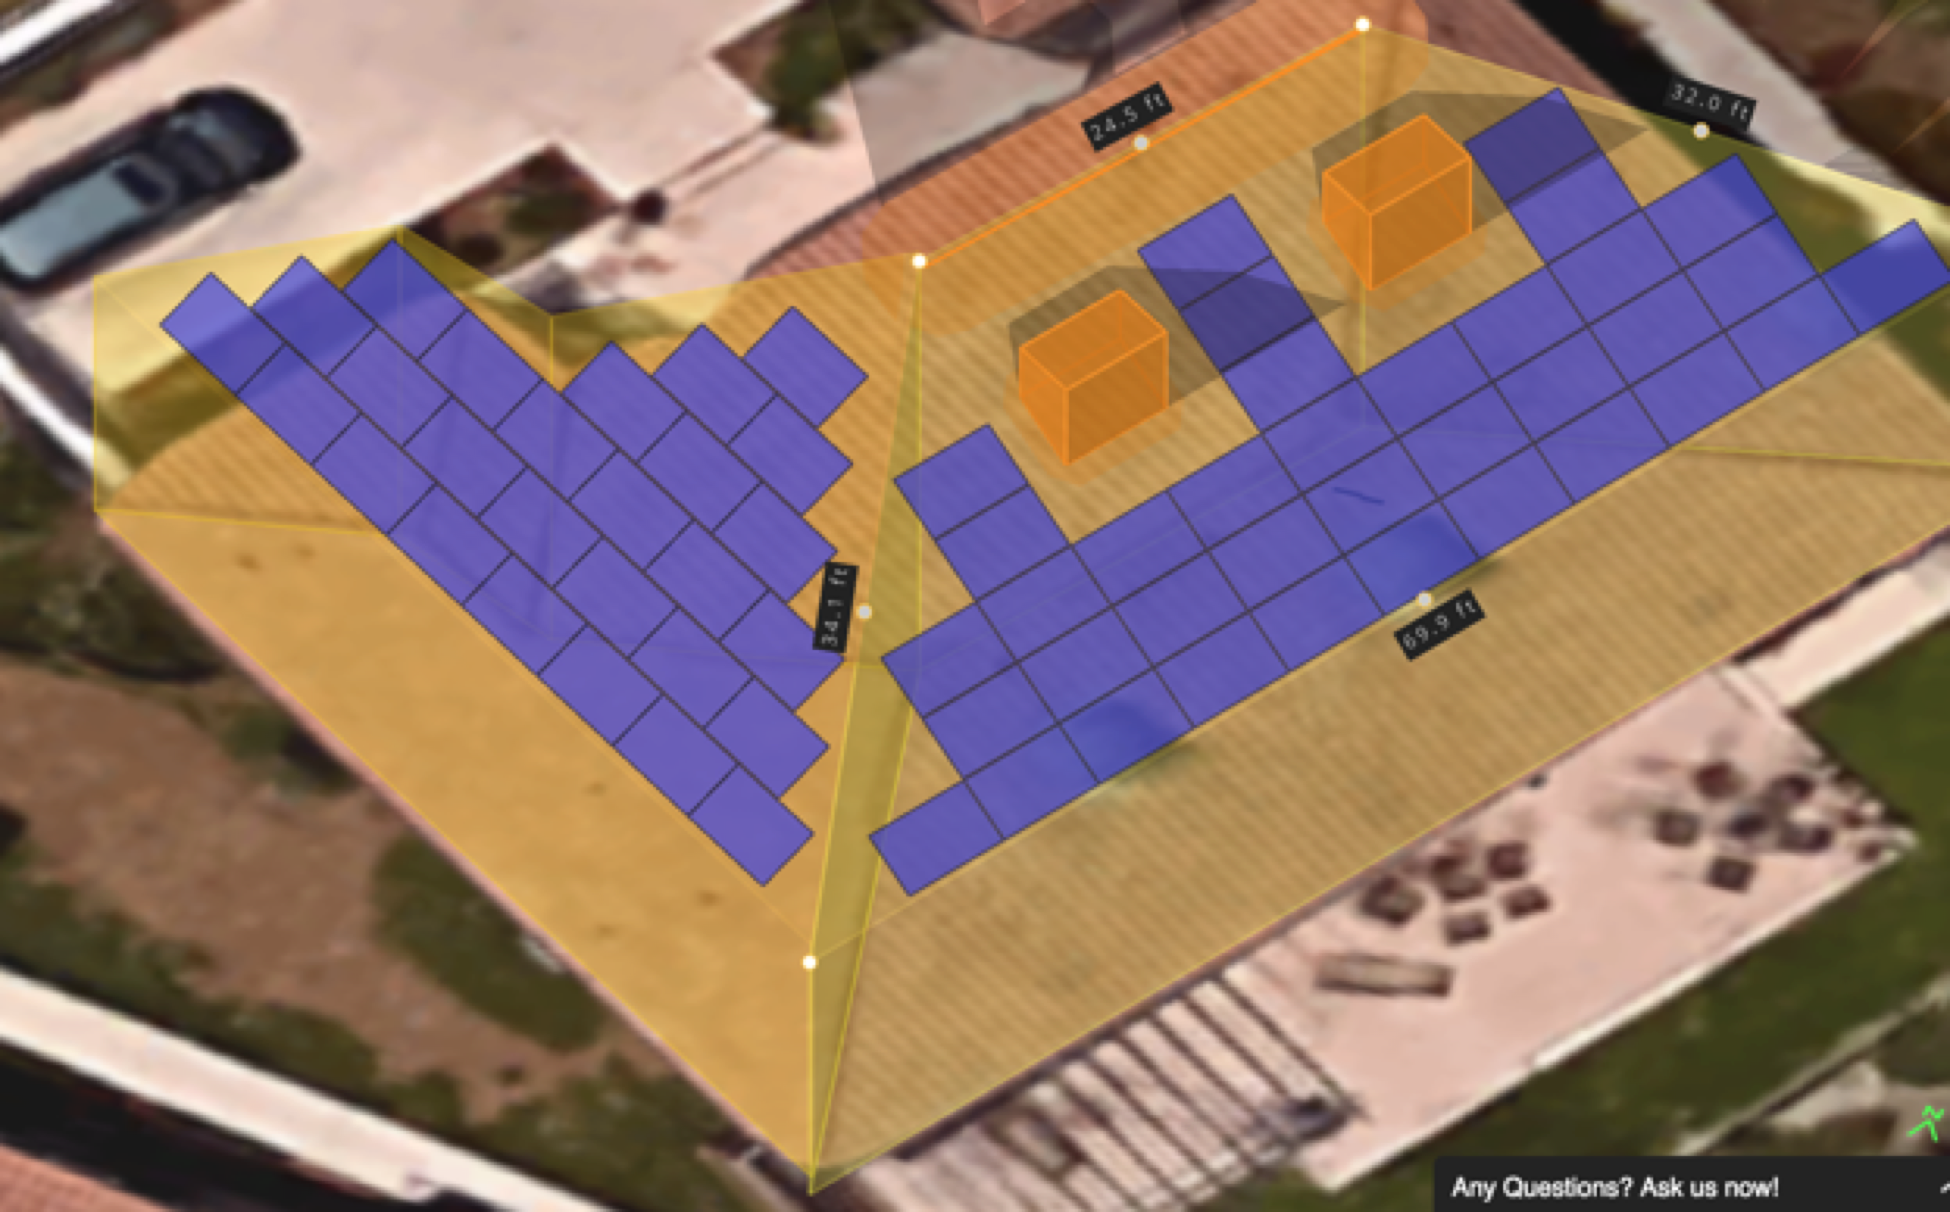
- Optimize shaded modules: click on Advanced, then Shading to access the module shade optimization. This feature estimates the shading on each module throughout the year and enables the removal of shaded modules.
- Choose inverter (microinverter or string inverter): Select a string inverter, and HelioScope will automatically set an inverter quantity that results in a DC-to-AC ratio of approximately 1.25. Select a microinverter, and HelioScope will automatically configure the AC array accordingly, then move the red icon to the point of grid interconnection.
